The Harness Case Study

The Harness started out as a humble 'App' to send and receive MQ messages on the thin client, but it has since grown to become an indispensable tool for Siebel development and testing. This was introduced to readers on a previous post titled 'The Harness'

In case you missed it, here are some of its key features

* Simulate any Business Service from any screen with active context
* Run eScript on the fly in any object manager
* Construct & perform BC operations without scripting
* Send/receive MQ messages
* Base64 encode/decode, and previewing of Base 64 images
* Regular regression tester with result highlighting
* Generate random test data
* On the fly XML conversion between Siebel formats, and passing as an input into a BS
* Open UI API browser/console

These features were built for the developers of a specific client, but if you like the idea of building such a tool for your own project, this article provides an approach for the new breed of Siebel/Web solution designers out there to follow.

Architecture


The above diagram highlights the main components that make up The Harness. Each point will be discussed below.

1. The Harness UI

Provides an interface allowing developers to interact with your Tool.

The UI was hand built using HTML, with jQuery for handling the interactions, and providing the animations.

[Responsibilities]

Provides pretty UI for the user
Pretty prints ECMA Script/XML, displays tabular data
Data entry


2. The Harness Core

The core logic (written in Javascript, with support from jQuery) responds to user actions, orchestrates the work needed to construct requests, execute actions and formats the response before being displayed to the user.

[Responsibilities]

Interface with Storage bridge
Interface with Siebel API through Proxy
Interface with Server libraries through Proxy
Convert between different data representations
Constructs Request from data elements


3. Proxy

Communication between browser and server is managed through a custom proxy, which routes all browser commands to a common entry and exit point. The proxy communicates with the Siebel through a business service invocation, using PropertySets to transport data.

[Responsibilities]

Interfaces with Siebel API
Single point of communication between browser/server
Encode/decode HTML entities
Encodes/Decodes command from browser/server


4. Local data store bridge

The local data store bridge provides a high level API for interfacing with the available storage technologies on the browser. There are many 3rd Party storage libraries that provide this functionality, eg. LawnChair, jsStorage, PersistJS

[Responsibilities]

Interface with lower level browser Storage API


5. Third Party

Third Party libraries are used for syntax highlighting, JS code editor, JSHint, animation

[Responsibilities]

Adds sugar to The Harness


6. Local storage

Local storage is medium for persisting data on the Client. This can be Web SQL, IndexedDB, HTML Storage, Cookies, depending on what is supported on the users browser. The APIs for these storage options are different, so we’ve used the local storage bridge above to abstract the browser implementation from our logic.

[Responsibilities]

Persists client side preferences
Stores historical requests
Save to favourites


7. Browser (Siebel) UI

The Harness is linked to the Siebel UI. This means, we can get the active context of the current browser session, allowing us to implement a business service simulation interface that can work with TheApplication().GetActiveBusObject(). This also allows us to run browser script, or call Open UI’s new API.

[Responsibilities]

Launches The Harness
Interface with Siebel’s browser layer
Interface with Siebel’s active context


8. Server deployed components

This consists of custom script libraries, JAR files, WFs, supporting Business Services, and SRF modifications.

[Responsibilities]

Provide server support for our features


Challenges

Working external to the Siebel repository, and outside the guidelines of classical Siebel development brings some new challenges.

This is the world of the new hybrid Siebel/Web developer, but the lessons learnt here, is also applicable for traditional developers.

Supportability, Maintainability, Persistence, Session Attachment, Access Rights, Deployment

Supportability

When designing a solution, whether it be for Siebel, or for some other application, best practice dictates that we stick to the published supported interfaces.

Undocumented features in Siebel can be an ambiguous bucket.

There are a lot of ‘undocumented’ features in eScript as it is based on the ECMA specification. Siebel provides documentation for its eScript API, but not for all the ECMA scripts features, so projects need to make sound judgements on the use of these features, and have the in-house expertise on standby to support it.

However if you’ve discovered an undocumented user property, remember this isn’t part of any supportable standard. First consider the available alternatives, then choose to use it with caution, but have a contingency plan. User properties have faired quite well in upgrades compared to scripting alternatives.

However, if the solution depends on a hack, be prepared to lose that feature in a future upgrade.

The Harness was built pre Open UI, and has lasted upgrades through 8.1.1.15, 8.1.1.10, 8.1.1.11.

Maintainability

Can your solution be easily extended without too much effort? Your design, should limit the points of configuration, utilise common libraries, and separate configuration from code, this will help with maintainability and extensibility. Spend the time to refactor your code at key stages of its development.

Persistence

Like user preferences in Siebel, the goal of persistence is to remember changes in the state of the browser, and personalize the experience.

As a testing tool, The Harness was built to remember inputs for named test cases, and historical test runs. As a development tool, The Harness had to remember previous actions for recall, review, and reruns.

Cookies may be the first consideration for Siebel veterans who have a side interest in web technologies, but there are better modern alternatives such as HTML storage, Web SQL, Indexed DB. Unfortunately, the implementation isn’t quite standard across browsers, so the solution to this is to use a storage bridge to abstract your interface from the capabilities of the individual browsers.

Keep in mind that these are cached on the clients hard disk, if there is a requirement to have persistence across different machines, then the naturall place for this is on the server. The Harness utilizes a further layer of abstraction on top of the 3rd Party library, allowing it to switch to a different API without costly changes.

Session Attachment/Access Rights

The Harness UI is built from an independent HTML file, and needs to be launched by a user’s action. Considered placements for this launch, can range from the Application menu, from a button on an admin screen, short cut key launch, or via a visibility based icon.

This leads to the question of how to secure the tool from unauthorised access. My mentor once told me, the best security is non-disclosure, if the users don’t know it’s there, they won’t be able to use it!. Although there is some truth to that, The Harness employs a more secure approach by providing access rights through a server side administration screen.

Deployment

The Harness weighs in at more than 10Mbs, with server and client side artifacts. It was important to facilitate ease of installation, updates, and maintenance on the product.

The Siebel web server separates its resources into different locations for SCRIPTS, FILES, 3RDPARTY and IMAGES. Following this pattern makes sense, but it also makes it more error prone to deploy without a proper build process.

An ANT build process was implemented to facilitate deployment of external file resources.

Conclusion

Have your staff have been stuck troubleshooting why a piece of code runs differently in the users object manager, than the WF Object manager?. The Harness can dispatch a chunk of eScript to run on the Server, without costly compiles/deployment.

In a diferent scenario, a developer might be wondering why an XML payload, when transformed into a Siebel Message doesn’t 'upsert'. With The Harness the developer can take the transformed message, or handcraft a modified version, and test out different message structures on the fly, and upsert it without touching tools.

Siebel developers around the world have figured out ways to work smarter, and build competitive advantage through custom tools and processes. It’s in the DNA of every developer, hopefully these ideas inspires designers out there to take the next step to build unique solutions for your clients.

Open UI: Close Popups on Escape Key

The ESC key in many traditional applications, provides a convenience shortcut to stop, undo, or go back in the application. It enhances the usability of an application by allowing the user to navigate backwards quickly or work more effectively work with two hands.

This feature is also built into major modern browsers, with the ESC key allowing users to dismiss dialog boxes. This feature works on native browser dialogs such as the alert, confirm and prompt dialogs, as well as artificial dialogs, such as the new notification pane seen in Open UI.


Right click on the Notification Pane, and inspect the source code behind this UI element. It will look something like this:


The class attribute of the container gives it away as a jQuery dialog.

You may not know it, but you will be interacting with jQuery dialog boxes throughout Siebel Open UI. Just inspect the browser source for any MVG, Pick or any Popup applet in Open UI, and it will reveal the same class attributes as the Notification Pane. This tells us they are constructed using the same plugin, except these other 'dialogs' cannot be dismissed with the ESC key.

Lets see if we can imbue these other applets, with the ability for us to dismiss them using the ESC key.

This behaviour is controlled by the following code snippet

$("[name=popup]").dialog({
    position : "center",
    modal : true,
    autoOpen : false,
   //This line disables the ability to dismiss dialogs using ESC             
   closeOnEscape : false
});


Log onto the Application, and select “Help > About View”, open the Query Assistant Applet, or choose any other popup applet, this will initialise the jQuery dialog. Press the ESC button, and at the moment, nothing will happen.

Press F12 on your browser to bring up the built-in debugger, and paste the code below.

        $("[name=popup]").dialog( "option", "closeOnEscape", true );


Now with that same popup applet still open, press ESC, and watch that applet disappear. Any popup applet that is opened in the Application at this point also inherits this behaviour.

The above code will act the basis of our solution, but it only works if a popup has already been opened, so the most appropriate event is the first time a popup applet is displayed. This makes ShowUI a good candidate, as we can detect when a popup is open, and set the dialog option.

For testing purposes you can put the following code the ShowUI handler of any popup renderer.

if (!$( "[name=popup]" ).dialog( "option", "closeOnEscape" ) ){
    $("[name=popup]").dialog( "option", "closeOnEscape", true );
}


The above code detects if the closeOnEscape option of the jQuery dialog is disabled, and proceeds to enable it. It works even if the first popup applet is opened, and has been initialised to false.

The above code only works for a particular applet, and any subsequent popup applets opened from that point onwards, so a better approach is to put the code under the global ShowUI handler, which will enable the feature for any popup that is opened, however we only want to run it once.

To achieve this, we can use the technique below, which re-writes the logic to cut out the if statement after the first time the dialog option is set.

Note: This code is provided for educational purposes only, and should not be used in production environments.
function Global_PreShowUI(){
    //Call the usual ShowUI function
    Global_PreShowUI_Rewrite();

    //Perform popup dialog check
    if (!$( "[name=popup]" ).dialog( "option", "closeOnEscape" ) ){
        $("[name=popup]").dialog( "option", "closeOnEscape", true );
        //Rewrite the current function after the first popup has been detected
        Global_PreShowUI=Global_PreShowUI_Rewrite;
    }
}


function Global_PreShowUI_Rewrite(){
    //Show UI code goes here
}


The line below shows where the application logic is being re-written.

    Global_PreShowUI=Global_PreShowUI_Rewrite;


The subsequent time Global_PreShowUI is fired, it will go straight to the real Global_PreShowUI_Real handler, which means our conditional test is only evaluated once. Neat!

Usability has always been thrown in the too hard basket, and although browser script techniques have been available to improve usability in Siebel HI, it has only been attempted by the brave.

The ESC key is already used in Siebel to undo query, undo record, and dismiss dialogs. Open UI now provides the option for customers to extend this feature to all Siebel popup applets.

Open UI: SiebelJS.Log & The Stack

Introduction

SiebelJS.Log allows the developer to debug the application by writing to the browser console. This has been provided since 8.1.1.9.

Most modern browsers have console.log which performs the same function, except console.log causes an error in IE if the developer toolbar has not already been opened. SiebelJS.Log avoids this problem by first checking if the console object is available, before calling the log method.

SiebelJS.Log is better for this reason.

SiebelJS.Log in 8.1.1.11

In 8.1.1.11 Oracle changed the way SiebelJS.Log works.

SiebelJS.Log no longer supports a string argument, but rather an Error object. This also means all previous log statements from 8.1.1.10 will be ignored silently.

Update: The above behaviour affects the only the 8.1.1.11 sample application. SiebelJS.Log has been redefined in 8.1.1.11 to support an Error object, but passing in a String will still log to the console. Usage
TestPRList.prototype.ShowUI = function(){
    hello_a();
};

function hello_a(){
    hello_b()
};
function hello_b(){
    hello_c()
};
function hello_c(){
    SiebelJS.Log( new Error('Error occurred here')) ;
};


Result


Notice that it produces an error message with a stack trace.

If you don't like the stack trace produced by SiebelJS.Log, you can call SiebelJS.Trace or console.trace directly to produce a stack trace without the error message.

Just substitute SiebeJS.Log with console.trace in the above example. This results in a much cleaner output as can be seen below.


console.trace is supported in Chrome, Firefox, and Opera.

Conclusion

Although there has been no official documentation page on the SiebelJS class and its available methods, it has been used in Oracle Bookshelf alongside usage examples of other methods, and as such, can be considered to be implicitly documented.

For better or for worse SiebelJS.Log has been redefined to be used as an error logger. Open UI customers that need a method for logging, are better off creating a wrapper around console.log, and put it in a client side library (if you haven't already done so).

8.1.1.11 brings many changes, including unspecified changes to the browser API. Customers that are upgrading from 8.1.1.10, will find that customizations don't port over without some rework.

The temptation to use undocumented methods is ever present, because the source code is more readable than the documentation. This serves as a good reminder for us to avoid using undocumented methods, or at least have a good mitigation strategy if you do use them.

eScript: The Siebel Stack

Does your Error Handling framework provide you with a stack trace? People have asked me whether its possible to get the stack trace, or get the name of the function when an error occurs in Siebel. I cautiously say Yes to both, because this method can be easily abused. This article is aimed at the framework designer looking to enhance their project's error handling capabilities.

Respected ex Siebel engineer Mike M Lin, wrote an article on Getting the Call Stack from eScript. In that article, he raises a Siebel exception, and scrapes the error message property to get the call stack. Unfortunately in Siebel 8, Siebel has removed the stack trace information from the error message property when using TheApplication().RaiseErrorText. Siebel has also blocked the ability to enumerate the error object, so the same test case can’t be performed.

According to bookshelf, when an operation fails, Siebel generates an Exception Object. The exception is documented with two properties: errCode, and errText

I’ve taken the Siebel example, added some log statements, and put it through The Harness


We verify that the error is indeed an instance of the Exception Object, and that the Siebel example works.

Next I modify the example to include the two properties that Mike M Lin, identified as part of his test case:

name, message.


Name turns up a blank, and message stores the same value as errText. There is no stack trace in sight, so I try the same test case with TheApplication().RaiseErrorText(), as Mike did, but unfortunately this also produces no stack trace.


Producing the Stack Trace

We can conclude that the Siebel Exception object no longer produces a stack trace, but Siebel Exception objects aren’t the only types of Error objects that are created in eScript. According to the ECMA specifications, which Siebel eScript is based on, there are other types of errors that can be thrown.


In the above example I’ve created a Reference Error, which reveals that the Stack trace is accessible with other error objects within Siebel.


Heres another example, showing the stack trace that is produced with more than 1 function. You'll notice that the stack trace at this point contains a dummy error message, but we'll see how this can be utilised a little later.


Getting The Current Function Name

Getting the stack trace is nice, but it would be great, if we could also get the name of the function that the error occurred in. We can see from the above stack trace, that it would be trivial to write a routine to extract the name of the last function.

The stack trace format is different of the Siebel 7 example, but it's not hard to parse. Heres a quick test case that I put together.


Note: In Siebel 7, the name of the current function can be accessed by "arguments.callee" in eScript, however this has been deprecated in Siebel 8.

Error Object On Steroids

Armed with the above knowledge we can now produce a stack trace at will (even for Siebel generated exceptions), throw back a custom error object containing our stack trace, and log it as part of an Error handling framework.

The concept of throwing a custom error object has been discussed before in ABS Framework - Logging & Tracing Module. The author of the ABS framework has provided some really interesting concepts around error handling, but if we strip away the message lookups, variable bindings, and the bells and whistles, we can take away the concept of throwing custom error objects, and mix it with our idea of generating a custom stack trace, plus extracting the name of the error function.

It can be boiled down to the following steps.

1. Throw an error
2. Check that the error is not an instance of our custom error
3. Cause a stack trace using the method described above
4. Scrape the relevant stack trace information, and ignore the dummy error message
5. Scrape the error function name from the stack trace, also described above
6. Create an instance of custom error with the above data
7. Insert the original error from the real error object into the custom error object
8. Re-throw the custom error
9. At your root function check for the custom error, and log the stack trace, error information


The above steps outline how to create and handle a custom error object. A framework designer can take ownership of it, and incorporate these ideas into your own in-house error handling framework.

Logger Concept

Another complimentary method is to implement a custom script logger. This was also introduced to readers, when we visited the ABS framework logging capability. For a real life example of a logger, Siebel master Mik has kindly shared his design here.

A sample logger template looks like this.


function MyFunction (){
try{
     log.begin("MyFunction");//hard coded function name
}catch(e){
     log.error(e);
}finally{
     log.end();}
}


Every function would contain the above template, in which a custom logger is called with 3 main methods.

log.begin - Pushes a string of the current function name onto a custom stack
log.end - Pops the last function from the stack.
log.error - Logs the error

When an error occurs, you know that the last function in the stack is where the error occurred, and by its very nature, the custom stack can be simply printed out, as it is just an ordinary array.

The downsides of this technique against the one described above is that it does not provide line numbers, and the developer is also responsible for hard coding the correct function name in log.begin, and also consistently calling log.end.

Conclusion

By causing Siebel to stack itself, we are able to take advantage of the extra information that is provided by the standard ECMA error objects. This provides crucial information of the events leading up to any Exception, including the exact line where it occurred. And with a little added imagination, we can collect further information from each function as the error object is bubbled up the chain, a la ABS framework.

In this article, I've shown how we can get the name of the current function, generate a stack trace at will, and its importance in error handling. Integrating it into your own framework is the fun part, this will require engagement with your core framework professionals, and will require an impact analysis.

Credits goes out to Mike M. Lin for providing the seeds for this article, Mik Branchaud for sharing his logger design, and Mr ABS for sharing his wisdom on error handling in the ABS framework.

Open UI: Build Process


Introduction


Siebel projects that are crossing over to Open UI, will soon realise the immediate need to implement standards around the development and deployment of the external resources in Open UI. Unlike traditional Siebel development, where source code is checked into a database and compiled into a SRF with a proprietary IDE, Open UI is based on text files that can be edited using Notepad.

Managing external files is not new to Siebel development, but it has never been mainstream, and the processes for managing these resources are not as mature on Siebel projects. This article is aimed at Siebel development managers looking to incorporate best practice from file based development environments, and integrating them with Open UI.

Traditional Vs Modern Siebel Development

A traditional Siebel development cycle involves the developer checking out and locking a project/object, the developer performs the modification, and checks it back in. The Siebel repository stores the source code, which must be compiled into SRF.

Parallel development can be achieved by following the above process with a second repository, and managing the code promotion through a separate environment path. Eventually when those code bases needs to be merged, objects are moved between repositories through exporting and importing SIFs. Siebel provides a decent merge tool for configuration changes, but merging script is always a risky affair, due to the inability to perform a line by line merge.

With Open UI development, developers have to switch from working with a database base repository to a file based repository. This file based repository is similiar to the Siebel repository that it stores the single source of truth for a particular release. Parallel projects can also be supported in a similiar manner, by establishing a separate container.

Open UI development is very much like web development, files can be edited freely in your code editor of choice, the application can be easily debugged from any browser, and you have the flexibility to pick and choose your add-on web technologies. There is no longer a dependency on the Siebel way to build your application.

Building your Application

Do you use XSLTs, client side business services, custom images/JS/CSS, customized web templates? Then you need a build process. A build process allows projects to automate the production of artefacts for deployment with the following advantages

* Resources are deployed in a consistent manner
* Automated quality checks
* Files are optimised for Production
* Integration with Source Control
* Automated unit testing

To achieve the above tasks, we’ll need to establish the build process, procure the required toolset, and develop the necessary automation.

Establishing a Process

Projects need a formal strategy to manage the migration of files from source to deployment. Fundamentally this process should address how files are tracked, changed, merged and deployed, across multiple parallel development streams. This shouldn’t be new territory, so projects don’t have to go shopping for a new process, unless it is broken. Existing HI file deployment processes can be carried over, and augmented to incorporate the some of the best practices from modern web development.

* Integrated Source control
* Continuous Integration
* Automated test cases

SCM (Source Control)

The concept of building an application requires that we have a source. For traditional Siebel development, this source is the Siebel repository, in Open UI, the source should also be in a repository, but it is more likely to be a file repository rather than a database repository.

There are many solutions in the market that offer Software Configuration Management (SCM), but it is up to each project to choose the appropriate solution for their needs. The most obvious place to look is within your own organization to discover what SCM software is available, and used by other IT sections. This allows you to take advantage of the licensing agreements, and leverage the existing support arrangements that are already in place. Open source/free SCM sounds great, but it is risky to introduce it into an Enterprise, unless you have the expertise to maintain/support it yourself, otherwise prepare to negotiate for the support arrangements.

Build Automation

Automation tools allow projects to enforce a standard build process to a set of source files, create build packages and deploy it into its destination. Many projects schedule the automatic compilation of the SRF, generating browser scripts, and deployment of the SRF into development environments overnight. The same process could also be extended to deploy Open UI resources into the same development environment.

Here are some examples of automation that can be applied to Open UI resources before deployment

* Add standard headers such as revision, organization details, release information, disclaimers to all files
* Strip comments from files
* Compress JS/CSS files through minification
* QA JS files with JSHint/JSLint
* Consolidate common JS Files to reduce HTTP requests
* Extract metadata from JS files, and produce documentation
* Run unit test scripts

Are you using a build process for HI? The same principles can be used in HI for other external resources.

Here are some ideas

* Automatically turn off XSLT indenting
* Generating XSLT documentation
* Extracting eScript from the repository and validating it
* Run interface test cases

Code Editors

While Notepad and other standalone editors are sufficient, it is recommended that you choose an editor that has the capability to detect JS language errors, integrate with your SCM, and automation tools.

Siebel Tools has this capability built in to an extent, but in Open UI, if you miss a closing bracket, and it is loaded via a common file, your application could fail silently, and pin pointing it to its exact source might not be fun. Code editors can perform the role of QA, by ensuring that your code is free from syntax errors before it is run against more stringent QA checks by programs like JSHint/JSLint

Automated Test Cases

Automated test cases are used as part of Continuous Integration to ensure that changes from multiple developers, work coherently and doesn’t break the application. The challenge is that developing automated test cases for the UI isn’t easy, at least not for traditional HI UIs. Open UI promises to be open, and exposes a new set of APIs for browser automation tools to interact with.

Until Oracle provides an Open UI automation client (for developers), conceptually, a project could develop their own Open UI automation testing, using a combination of the following tools

* Selenium
* Watir
* Ruby
* Custom JS OUI automation API

Selenium provides the browser automation, Watir is a ruby library that provides a nice abstraction onto of Selenium, and a custom JS interface provides the API bridge between Ruby, and the Open UI client.

Toolchain

Your build process will be dependent on the tools that’s supported by your organisation. The best tools for the job, are dependent on a variety of factors, like cost, availability, familiarity, features, and support. There isn’t a standard set of tools for everyone, however the main tools in your arsenal should be the IDE, SCM, and Automation tools

* List of source code editors
* List of build automation software
* List of SCM software

Other tools to investigate

* JS minification
* JS/CSS consolidation
* JSHint/JSLint
* JS Documentation

Conclusion

Establishing a build process isn’t something that is restricted to large teams, it just important to have this process in place for a single developer working offline. There are times when you need to blow away an environment and rebuild from source control, or you need to rebase to a completely new project. Having source code control becomes critical for working in Open UI especially in large teams, so gone are the days where it is acceptable for developers to modify files directly on the web server.

A build process can ensure that your application remains stable throughout the iterative development process, or alternatively without one, your project can become a cowboy arena, where developers go in, make adhoc changes, send off different file revisions for deployment via emails, and break the application at every deploy. The choice is pretty clear.

Further reading

* Why use source control
* Setting up a JS Build Process
* Siebel Continuous Integration Setup
* Branching, Merging concepts with Git

Some customers will have more mature processes than others, so what build tools are you using in your project?

To kick this off, here’s what works for me

* ANT (Build automation)
* ClearCase (SCM)
* Eclipse (IDE) + ClearCase Plugin
* Sublime (IDE)
* Eclipse JSHint integration via RhinoJS
* YUI Compressor (JS minification)
* + Selenium & Ruby for some UI automation fun

The State of Siebel: Report and Survey

If you weren't able to follow Bruce Daley's webinar "Where Do You Stand with Siebel" yesterday, here is a short wrap-up:

Oracle Siebel CRM is a mature application showing both continued robustness and signs of age. With Oracle sending mixed messages about the product’s future, Bruce Daley, VP at Constellation Research has published a report which helps Oracle Siebel customers understand the real position Siebel technology holds in the market, why the conventional wisdom about the product is often wrong, and what trends are driving misconceptions in the market. It also offers pragmatic advice for taking Siebel implementations in different directions and how associated careers will be impacted.

You can view the replay and download the slides here.

You can download the report with compliments of Rimini Street here.

State of Siebel 2013 Survey

Along with the report, Constellation Research and the Siebel Essentials blog are conducting a survey to feel the pulse of the Siebel community. If you are involved in a Siebel CRM project, please take some minutes to fill in the survey form.


Click here to access the survey.

Constellation Research to Host Webinar on Where You Stand with Siebel

This free 45 minute webinar will discuss what different directions Oracle Siebel professionals can take their Siebel implementation and their careers.

Who: J. Bruce Daley, Vice President and Principal Analyst Constellation Research
What: Webinar: "Where Do You Stand With Siebel”
When: Wednesday, September 18, 2013 at 9:30 a.m. US Pacific time

Constellation Research, Inc., the award-winning research and advisory firm focused on disruptive technologies is offering a free 45 minute webinar to introduce a new analyst, J. Bruce Daley, in one of his primary research areas - the standing, enhancement, and conversion of legacy enterprise class software technology.

His topic will be the different directions Oracle Siebel customers, partners, and consultants can take their Siebel implementation and their careers. This year marks the 20th anniversary of Siebel technology and as a mature application it shows signs of both robustness and age. With Oracle sending mixed messages about the product’s future, this webinar helps people making a living with Siebel determine exactly where they stand.

“Clearly Siebel technology is not dead and plays an important role in the IT infrastructure of many of our clients” noted R “Ray” Wang, CEO of Constellation Research.  “Figuring out exactly where Siebel fits into the mix is challenging. We are excited that Bruce will bring his wealth of understand and experience to helping Siebel customers meet this challenge. ”

Daley was, for many years, the publisher of the Siebel Observer, the largest publication covering the CRM pioneer.  Later he co-founded a boutique advisory services firm that brokered the sale of system integrator Blue Hammock Inc. to GCI International (now called Collabera) and conducted over 250 consultations with mutual funds, hedge funds, and private equity funds. Widely quoted in The Wall Street Journal, The New York Times, The Financial Times, Daley also founded the Enterprise Software Summit.

His first research paper for Constellation: “Seeing the Good, the Bad, and the Ugly in Legacy ApplicationsHow to Attack or Defend an Installed Base by Understanding How to Qualify the Success of a Legacy Applications was published this week. This original research helps sales representatives and sales management determine how likely a legacy implementation is to be converted so they can qualify opportunities and threats more quickly. The report is available for purchase at http://www.constellationr.com/

His second research paper “The State of Siebel in the 2013 Market: Different Strategies for Moving Siebel Implementations Forward and Assessing Career Risk will be published next week. This research helps Oracle Siebel customers understand the real position Siebel technology holds in the market, why the conventional wisdom about the product is often wrong, and what the trends driving the misconceptions in the market. The report also offers pragmatic advice for taking different Siebel implementations in different directions and how they will impact different careers. The report will be available on the Constellation website Wednesday, September 18, 2013 at:

9:30 a.m. US Pacific time
10:30 a.m. US Mountain time
11:30 a.m. US Central time
12:30 a.m. US Eastern time
17:30 UK time
18:30 Central European time

Webinar Information: To register for this complimentary webinar, go to: https://www3.gotomeeting.com/register/578393734

Open UI: Tab Order Defect

In a scene from The Matrix I, Neo has a moment of deja vu, when he sees a black cat walk by twice. His companions freeze in their tracks, because this usually means The Matrix has been altered. Readers of Impossible Siebel, also had their black cat moment, when they discovered the Tab Order defect in 8.1.1.1, and then saw the same Tab Order defect again in 8.1.1.2. Just like that deja-vu moment, here we are again facing a Tab order defect in Open UI popup applets.

This problem affects any popup applet in OUI that has a custom tab sequence. To see this problem visually, goto any applet, enter query mode, and click on the Query Assistant applet.

Right click on the first control this applet, and inspect the source for this element.


Do the same for other controls and buttons on this applet. By default, all controls on a popup applet have a tab index of 0.


Next, find this applet in Tools, and add a custom Tab sequence, the actual sequence doesn't matter, as long as it is defined. This causes Siebel to produce the tabIndex attribute, and provide an actual sequence.

After our little modification, inspect the source code again, and it should look something like this.


This looks good, Siebel correctly generates the correct tab sequence, however try tabbing through all the controls on the applet, and watch what happens when the the last tab sequence is reached


The tab order doesn't cycle back to the first control as it did before, but it jumps back to the base applet behind the popup applet. This causes a commit, and can produce the above error, depending on what your base applet is.

The reason behind this is, Siebel provides each of the base applets with a starting range for the tab sequence. The first applet starts at 1000, the next starts at 2000, and so on. When a popup is invoked, the controls on that applet are 0, if no tab sequence is specified, when a tab sequence is applied Siebel produces a tab sequence starting from 10000. When the last control is reached on the popup applet, it naturally returns back to the first applet, causing a commit and consequently an error.

Solution

1. Create a global render
2. Detect if the applet is a popup
3. Check for a custom tabIndex sequence
4. Put a custom event handler on the last tab index
5. Move the cursor back to the first control, when it reaches the last control

Steps

The strategy to create a global handler has already been discussed in the Open UI: Mouseover Tool Tips - Part 1 article.

1. In summary create the following JS file

//GlobalShowUI.js
if(typeof( SiebelAppFacade.PhysicalRenderer.prototype.bShowUIProxy ) === "undefined"){
    SiebelAppFacade.PhysicalRenderer.prototype.bShowUIProxy=true;
    SiebelAppFacade.PhysicalRenderer.prototype.ShowUI=(function(){
        var PRShowUI = SiebelAppFacade.PhysicalRenderer.prototype.ShowUI;
        return function(){
            Global_PreShowUI.apply(this, arguments);
            PRShowUI.apply(this, arguments);
            Global_PostShowUI.apply(this, arguments);
        };
    }()); 
}


//put Global Pre ShowUI logic here
function Global_PreShowUI(){
var pm=this.GetPM();
     if($("div[name='popup']").length>0){
           SiebelApp.ABC.fixPopupFormAppletTabOrder(pm);
     }
}


//put Global Post ShowUI logic here
function Global_PostShowUI(){
}

2. Add an entry into the custom_manifest.xml

3. Add the following code sample into your client side script library.

SiebelApp.ABC.fixPopupFormAppletTabOrder=function (pm){ 
    /*************************************
     SAMPLE ONLY, NOT FOR PRODUCTION USE!
    *************************************/
    var oAppletTabIndex,aAppletTabIndex; 
    //Get all popup applet controls with tabindex
    oAppletTabIndex = $("div[name='popup']").find("div.mceGridField>input[tabindex], button[tabindex]");
    if(oAppletTabIndex.length>0){
        //turn jquery object into array for sorting
        aAppletTabIndex = jQuery.map (oAppletTabIndex, function( o) {
            return ($(o).attr("tabindex")>0)?{ tag: $(o).prop("tagName"), seq: $(o).attr("tabindex"), sel: ($(o).prop("tagName")=="BUTTON")?"[id='"+$(o).attr("id")+"_Ctrl']":"[name='"+$(o).attr("name")+"']" }:null;
        });       

        //sort on seq
        aAppletTabIndex.sort(function(o1, o2) { return o1.seq > o2.seq ? 1 : o1.seq < o2.seq ? -1 : 0; });

        if(aAppletTabIndex.length>0){                     
            var sSelectorFirst=aAppletTabIndex[0].sel;
            var sSelectorLast=aAppletTabIndex[aAppletTabIndex.length-1].sel;
            //attach jquery handler on last tab index, and set focus back to the first tab index
            $(sSelectorLast).blur(function() {
                $(sSelectorFirst).focus();
            });
            $(sSelectorFirst).focus();
        }
    } 

    /*************************************
     SAMPLE ONLY, NOT FOR PRODUCTION USE!
    *************************************/

}


Code Explanation

    
    //Get all popup applet controls with tabindex
    oAppletTabIndex = $("div[name='popup']").find("div.mceGridField>input[tabindex], button[tabindex]");
}
Grabs all fields and buttons on the popup applet where there is a tab index defined.

        
    //turn jquery object into array for sorting
    aAppletTabIndex = jQuery.map (oAppletTabIndex, function( o) {
            return ($(o).attr("tabindex")>0)?{ tag: $(o).prop("tagName"), seq: $(o).attr("tabindex"), sel: ($(o).prop("tagName")=="BUTTON")?"[id='"+$(o).attr("id")+"_Ctrl']":"[name='"+$(o).attr("name")+"']" }:null;
        });    
}
The above command uses jQuery.map, to turn the first jquery object into a filtered array, of objects that contains the control selector, and tab sequence.

            
         //sort on seq
        aAppletTabIndex.sort(function(o1, o2) { return o1.seq > o2.seq ? 1 : o1.seq < o2.seq ? -1 : 0; });
Apply a sort on the new array, based on the sequence property that we created using the jQuery.map command.

            
            var sSelectorFirst=aAppletTabIndex[0].sel;
            var sSelectorLast=aAppletTabIndex[aAppletTabIndex.length-1].sel;
            //attach jquery handler on last tab index, and set focus back to the first tab index
            $(sSelectorLast).blur(function() {
                $(sSelectorFirst).focus();
            });

Once we have a sorted array, we can use the selector attribute to attach a handler to the last tab index control, which forces focus back to the first control

4. Restart your client, and now enjoy your new found love for tabIndex

Rapid Browser Script Development

This article was written pre Open UI and was locked up in vault, because Browser Script was becomming old school. But as an early user of Open UI, I've found the need to rapidly modify and troubleshoot browser script issues, and remembered the same technique which is used in HI, is also applicable to Open UI.

This article might be more appropriate for a Browser Script reunion party, but it has been released for those who may still struggle with Browser Script, and for Open UI customers who may still rely on legacy Browser Script.

-----------------------------------------------------------------------------------

I asked a trusty colleague to put a line of browser script behind a certain applet and perform an incremental compile on the server for me.

Colleague: What browser script command do I need to put on this applet?
Me: Anything you want, make it display an alert for me.
Colleague: Where should I put it? Applet Load? PreInvoke?
Me: It doesn't matter, just make sure it compiles.

10 minutes later, the server was rebooted, I got my new browser scripted applet and my colleague was free to continue his own work.

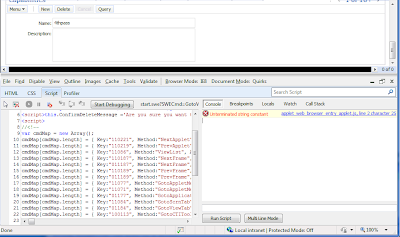
Unfortunately, when I took a look at the browser script behind the applet, my colleague inadvertently put a typo in the code, which caused the following error in the IEDTB console


Fortunately this doesn't matter for what we're about to do. In fact, the browser script didn't have to be valid, it can be total junk, but as long as it compiles and produces the browser script files, we're in business. What this does is forces Siebel to produce the necessary "hooks" from the UI to the external JS files.

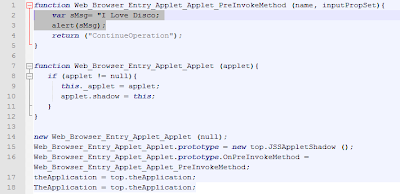
First we're going to fix that typo. Goto the web server, and find the generated browser script JS file for that Applet.

You'll find that it will look something like this.


We can fix that typo by re-writing the browser script error on the fly and instead of displaying a dialog box on Applet PreInvoke, we will re-implement the code to use a less obtrusive console.log on Applet Load, which means we will have to introduce a new OnLoad handler.

Change your JS file to the following.

function Web_Browser_Entry_Applet_PreInvokeMethod(name, inputPropSet){
 return ("ContinueOperation");
}

//Artificial Onload method hanlder
function Web_Browser_Entry_Applet_Load(applet){
 //write to the IEDTB console
 console.info("I Love Disco");
}

function Web_Browser_Entry_Applet(applet){
 if(applet != null){
  this._applet = applet;
  applet.shado = this;
 }
 
}
new Web_Browser_Entry_Applet(null);
Web_Browser_Entry_Applet.prototype=new top.JSSAppletShadow();
Web_Browser_Entry_Applet.prototype.OnPreInvoke=Web_Browser_Entry_Applet_PreInvokeMethod;
//Attach a new handler for Onload
Web_Browser_Entry_Applet.prototype.OnLoad=Web_Browser_Entry_Applet_Load;
theApplication=top.theApplication;
TheApplication=top.theApplication;


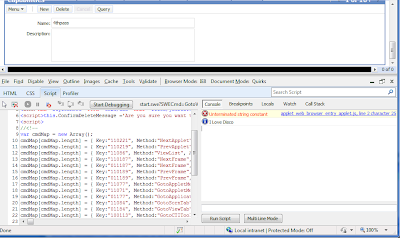
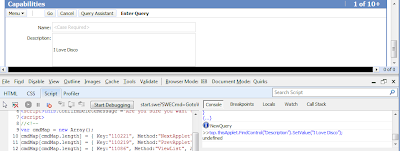
Open the IE Developer Toolbar by pressing F12, clear your browser cache, disable script debugging, and reload the Screen. Follow those steps exactly and your new change will take effect immediately.

Your screen should look like this.


Next let’s give ourselves direct access to the Applet scope from the Browser, this will allow us to write Browser script on the fly in context of the Applet, without reloading the browser!

Change your browser script file to include the following

//recreate the function on the global scope
top.OnPreInvoke=function(name, inputPropSet){
 console.info(name);
 return ("ContinueOperation");
}

//recreate the function on the global scope
top.OnLoad=function(applet){
 //create a global reference to the current applet
 top.thisApplet=this;
 console.info("I Love Disco");
}

function Web_Browser_Entry_Applet(applet){
 if(applet != null){
  this._applet = applet;
  applet.shado = this;
 }
 
}
new Web_Browser_Entry_Applet(null);
Web_Browser_Entry_Applet.prototype=new top.JSSAppletShadow();
//repoint the prototype functions to our new globals
Web_Browser_Entry_Applet.prototype.OnPreInvoke=top.OnPreInvoke;
Web_Browser_Entry_Applet.prototype.OnLoad=top.OnLoad;
theApplication=top.theApplication;
TheApplication=top.theApplication;


There are two key pieces in play here.

1) top.OnPreInvoke;

This line shifts execution to a global function that we’ve attached to the main window. Browser Script files are loaded from a hidden frame, so it must be attached to the top, for the console to access.

This global reference allows us to modify the definition of the function, and run new code without reloading the browser.

2) top.thisAppet

This is similar to the above, but this line provides us with access to the Applet instance.

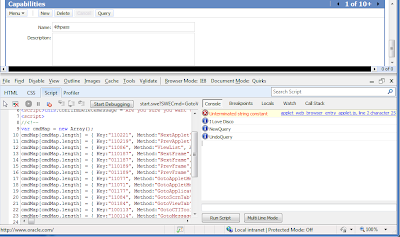
Click Query, and Cancel, to see the results of this dynamic browser script.


We now have direct access to the runtime context of the Applet, and we can develop directly from the IE console.

Overwrite the PreInvoke Handler, by pasting the following code into the console. Click “Query”, and we now see a dialog box.

top.OnPreInvoke=function(name, inputPropSet){
    console.info(name);
    switch(name){
       case "NewQuery":
          alert(name);
          break;
    }
}


Type the following code into the console, and what happens to the Description field

top.thisApplet.FindControl("Description").SetValue("I Love Disco");


We have just learned how to rewrite Browser Script on the fly, and handle events that are not defined in the repository.

The last step in this Rapid Browser Script development process, is to make sure that when you are happy with your browser script, remove those global references, copy the logic back into Tools, in the correct event handler and compile it to validate your handy work.

-----------------------------------------------------------------------------------

Open UI: Property Set Methods (GetChildByType)

Open UI: New Property Set Structure
Open UI: Property Set Methods (Copy, DeepCopy, Clone)
Open UI: Property Set Methods (Fixing Copy)
Open UI: Property Set Methods (Why Clone?)

The new chapter in bookshelf on Open UI Property Sets has a new method called GetChildByType. This has to be the most interesting method that we’ve seen so far. I’ve seen numerous custom implementations of this handy method written in eScript, and it’s about time Siebel have provided it out of the box, but sadly its only available on the Browser.

To understand how this can be useful, the follow is an example of code that was written to loop through a SiebelMessage n times to look for a child Property Set with a certain type.


You need to have eyeballs of steel to follow this example, but this should be a thing of the past. With this new method, we should be able to reduce the above example to 1 line.

Lets test it out.

//setup test case
//construct a deep hierarchy
var ps=theApplication().NewPropertySet();
var psChild1=theApplication().NewPropertySet();
var psGrandChild1=theApplication().NewPropertySet();
var psGrandChild2=theApplication().NewPropertySet();
var psGrandChild3=theApplication().NewPropertySet();
var psGreatGrandChild1=theApplication().NewPropertySet();
var psChild2=theApplication().NewPropertySet();
ps.SetType("Parent");
ps.SetValue("ParentValue");
ps.SetProperty("Mum","Georgette");
ps.SetProperty("Dad","George");
//first level child
    psChild1.SetType("Child 1");
    psChild1.SetProperty("Name","Bob");
    psChild1.SetProperty("Gender","Male");
        psGrandChild1.SetType("Grand Child 1");
        psGrandChild1.SetProperty("Name","Bobby's Kid 1");
        psGrandChild1.SetProperty("Gender","Male");
            psGreatGrandChild1.SetType("Great Grand Child 1");
            psGreatGrandChild1.SetProperty("Name","Bobby's Grand Kid 1");
            psGreatGrandChild1.SetProperty("Gender","Male");
        psGrandChild2.SetType("Grand Child 2");
        psGrandChild2.SetProperty("Name","Bobby's Kid 2");
        psGrandChild2.SetProperty("Gender","Male"); 
//first level child     
    psChild2.SetType("Child 2");
    psChild2.SetProperty("Name","Jane");
    psChild2.SetProperty("Gender","Female");
        psGrandChild3.SetType("Grand Child 3");
        psGrandChild3.SetProperty("Name","Janes's Kid 2");
        psGrandChild3.SetProperty("Gender","Male");       
psGrandChild1.AddChild(psGreatGrandChild1);
psChild1.AddChild(psGrandChild1);
psChild1.AddChild(psGrandChild2);
psChild2.AddChild(psGrandChild3);
ps.AddChild(psChild1);
ps.AddChild(psChild2);

 
console.log("Test case 1: " + ps.GetChildByType("Child 1").GetType() );
console.log("Test case 2: " + ps.GetChildByType("Child 2").GetType() );
console.log("Test case 3: " + ps.GetChildByType("Grand Child 1") );
console.log("Test case 4: " + ps.GetChildByType("Grand Child 2") );


Disapointingly, the results above show that “GetChildByType” only returns child Property Sets directly attached to the input Property Set, in other words, it doesn’t perform a recursive search of the entire Property Set as we might hope.

Custom GetChildByType

This falls back onto the customer to implement a custom GetChildByType that actually searches beyond the first level.

The safest place to house this new Method, is in a custom client side library.

There are multiple approaches on how to build this client side library, but for this article, we will stick with a simple example using the same style of registering a custom PR/PM.


For educational purposes, the following code shows how this function can be built, please don’t use the code without understanding what it does.


Next ensure that you load your custom logic in the custom_manifest.xml


Heres how one would use this new library function.
var psGrandChild=SiebelApp.ABC.GetChildByType(ps,"Grand Child 2");
//returns Property Set


Conclusion

GetChildByType is just one of the many new methods exposed in the Open UI Property Set. Although the intentions were well made, the limitations of the current implementation, make it hard for customers to embrace. Until Siebel provides a method in future to perform a recursive search, customers will do well to augment Siebel's API, with their own client side libraries.

Open UI: Property Set Methods (Why Clone?)

Open UI: New Property Set Structure
Open UI: Property Set Methods (Copy, DeepCopy, Clone)
Open UI: Property Set Methods (Fixing Copy)


Previously on Open UI: Property Set - Methods (Copy, DeepCopy, Clone), we discovered two new ways to copy a Property Set (DeepCopy and Clone).

DeepCopy is similar to Copy, except it merges two Property Sets together, while Clone performs a full copy of a PropertySet just like Copy, which raises the question around the meaning of life for Clone...until now.

To understand why Clone exists, we need to go back to the basics of ECMA script, which eScript, Browser Script and Java Script are all based upon.

Argument Passing

It is common knowledge, that there are two kinds of variables.

Primitive:
Number, Boolean, String, Undefined, Null

Complex/Composite:
Object, Array, Property Set, BusComp, Business Service, BusObject


Property Sets, BusComps, BusObject, Business Services are specific to the Siebel environment, and are considered to be complex/composite Objects, because they are derived from the base Object.


It is also "common" knowledge that complex/composite objects are passed into functions by reference. This view is supported by Bookshelf.

Passing Variables to Functions in Siebel eScript

Composite types such as objects and arrays are passed by reference.

However this is a common misconception, in fact all function arguments are actually passed in by value. Siebel professionals who work with Siebel Inputs/Outputs day in and day out, will testify to the opposite.

This is not the first time we've challenged the view of the world, so let me back this up with evidence, and what better way than to do it than with Siebel's Property Set Copy and Clone?


//Create new Property Set
var ps = SiebelApp.S_App.NewPropertySet();
//Set Type on original PS
ps.SetType("A");
console.log( ps.GetType() );
//Type stores "A"

//Perform Copy on ps
copyPS(ps);

function copyPS(ps){
     var ps2 = SiebelApp.S_App.NewPropertySet();
     //Create a new PS and set the type
     ps2.SetType("B");
     //perform a copy on ps2
     ps.Copy(ps2);
}

console.log( ps.GetType() );
//Type now stores "B"


The above test case starts off with a Property Set with a Type "A", which is passed into copyPS, which modifies the original Property Set's Type to "B". This is what we know and expect.

Watch what happens when we use Clone.

//Create new Property Set
var ps = SiebelApp.S_App.NewPropertySet();

//Set type on Original PS
ps.SetType("A");
console.log( ps.GetType() );
//Type stores "A"

//Perform Clone on ps
clonePS(ps);

function clonePS(ps){
     var ps2 = SiebelApp.S_App.NewPropertySet();
     //Create a new PS and Set the type to a different value
     ps2.SetType("B");
     //If this argument was passed in by Reference
     //it should contain the new type above.
     ps=ps2.Clone();
}

console.log( ps.GetType() );
//Type still stores "A", 
//the cloned value was lost!


With the same expectation as above, if ps were passed in as a reference, we would see that the original Property Set's type would be modified to "B", instead the original Property Set remains’ unchanged.

Here is another derivative of the above example

var ps = theApplication().NewPropertySet();
ps.SetType("A");
var ps2 = theApplication().NewPropertySet();
ps2.SetType("B");

//Perform Clone on ps
clonePS(ps, ps2);

function clonePS(ps, ps2){
     //If this argument was passed in by Reference
     //it should contain the new type above.
     ps=ps2.Clone();
}

console.log( ps.GetType() );
//Type still stores "A", 
//the cloned value was lost!


In the second example, I’ve moved both ps and ps2 declarations to global scope, and passed in the both Property Set "references". The function clonePS tries to reassign the reference but fails.


To explain this behaviour, think of ps as a reference that is being passed in by value and not as a reference passed in by reference. The reference can be used to modify the original Object, but the reference to the original object itself cannot be altered inside the function. The local copy can be changed to point to another object, however this local copy is independent from our original object.

eScript developers will be wondering, will this really apply to them? Lets fire up The Harness, and create a new test case using Server Script.


The above test case shows ps1 and ps2 being passed into a function, where the ps1 reference is set, and then reassigned to another Property Set. From our understanding above, the following statement fails

ps1=ps2

There are no surprises at this point, as the results reflect what we saw in the browser.


We can conclude that this behaviour exists in eScript/BScript and JavaScript, which are all flavours of the ECMA specification. The only exception to this rule is that with eScript, we get a special function argument modifier "&" that allows us to pass a reference by reference.

Conclusion

Siebel designed Clone to behave fundamentally different from Copy and DeepCopy, and provides it as a distinct alternative for those circumstances that the original Property Set should be preserved.

On the surface Copy, DeepCopy, and Clone look like they behave the same, but its only when we look beneath the surface, that we appreciate the subtleties of Siebel Property Sets. It brings me back to my favourite Yum cha restaurant, and being presented with Prawn & Basil dumpling, Deep fried Prawn Dumpling, and Prawn Gyoza Dumpling.

All claim to be Prawn dumplings, they have different presentations, but it’s not until you dig into it, that you begin to enjoy the subtleties of Prawn that is deep friend, pan fried, and steamed. The next time you copy that Property Set, spare a thought for the Siebel engineers who provided the different flavours of Copy, DeepCopy, and Clone, for you to enjoy.

Open UI: Mouse over Tooltips - Part 2

Open UI: Mouseover Tool Tips - Part 1

This is a continuation of Open UI: Mouse Over Tooltips - Part 1, where we invented our own Pre_ShowUI, and Post_ShowUI handlers. These handlers allow us to hook onto the physical renders base class ShowUI method, to trigger global behaviour each time a UI object is rendered.

Let’s imagine a solution where an administrator can log into the Siebel UI, identify an Applet, a Control or List column and specify some text. This will render a fancy mouse over tooltip over the control/list column, the next time the page is reloaded. No scripting, or configuration skills is required!.

Sequence of events

1. The user navigates to a view
2. The page will load all the base applets in the view
3. Post_ShowUI will fire for each applet that is rendered
4. Read Values from Data source
5. Attach tooltip to configured control

Data source

The data source can be as simple as a global JS configuration file, or in our case it will be retrieved from a table on the server. For the sake of simplicity our data source for this article will be the LOV table, with the following mappings.

Description = Applet Name
LIC = Control Name
Value = Tooltip message


The LOV table is unsuitable for a number of obvious reasons, and it is used here only to illustrate the build for this Tool tip configuration. I’ve created some sample records, and filled some values, that we will use a bit later.


Tooltip Loader

The Tooltip loader is fired from our custom global Post_ShowUI event, and performs the following functions.

1. Identify the current applet in context
2. Query the data source for the tooltip definitions
3. Attach tooltips to the Applet Controls/List columns

Reading the Data source

This job should be performed by a server side Business Service in tools, and for convenience I’ve used The Harness to quickly build and unit test the POC for this article.


The results pane shows the output structure that we want to send to the Browser, and confirms that our data is correctly populated in the Property Set.

There are a few custom commands in this example, which will be foreign to most Siebel customers.

util.getLOVObjs
getLOVObjs is a eScript library function that queries the LOV table and returns an Array

[].ObjToStr

ObjToStr is a eScript library function that prints out any Object for debugging

[].PSToStr

Projects with the ABS framework will recognise this utility. This prints out a Property Set for debugging


Script libraries are described here in Bookshelf. The implementation of the Script library is out of scope for this article, but the key take away from this example is, projects should be implementing utility libraries to encapsulate common functionality, and maximise reuse of script in the application.

Tooltip loader logic

The high level logic looks like this

1. Call retrieve Tooltips using a server side Business Service
2. Get Controls map from the current applet
3. Loop through Tooltip configuration
4. Build Control/List Column jQuery Selector
5. Attach Tooltip to Control/List Column


SiebelApp.ABCToolTips.LoadAppletToolTips=function(pm){ 
      try{
            var sAppletId=pm().Get("GetFullId"),sApplet=pm().GetProxy().GetName(),sModId="JLETooltips";        
            
            //Remove all tooltip indicators    
            $("#"+sAppletId+" img["+sModId+"]").remove();

            //look for table prefix, and also determine applet type
            var oAppletProp=SiebelApp.ABCToolTips._GetAppletProp(sAppletId);   
           
            //Get Tooltip definition from server
            var oTooltipCfg=SiebelApp.ABCToolTips._GetToolTipsFrSvr(sApplet);
            if(oTooltipCfg.length>0){

                  // retrieve all controls on current applet
                  var oControlsMap=pm().Get("GetControls");
                  for(var sTooltipCntr in oTooltipCfg){
                        var oOpt=(oAppletProp.isListApplet)?SiebelApp.ABCToolTips.OptionsHeading:SiebelApp.ABCToolTips.Options;            
                        oOpt.content.text = oTooltipCfg[sTooltipCntr]["Msg"];  
             
                        //Lookup control definition
                        var oControl=oControlsMap[sTooltipCntr];
                        if(typeof oControl!=="undefined"){         
                              var sIdSelector=SiebelApp.ABCToolTips._GetControlListColSelector(oAppletProp,oControl.GetName());
                              $(sIdSelector).qtip(oOpt);
                              $(sIdSelector).append("");
                        }else{                 
                        }
                  }          
            }
      }catch(e){
            throw e;
      }
}

SiebelApp.ABCToolTips._GetControlListColSelector=function(oAppletProp,sControlName){
      var sControlNameUnd=sControlName.replace(/\s/g,"_");                   
      var sIdSelector=( oAppletProp.isListApplet )?"#"+oAppletProp.sDataTablePrefix+"_"+sControlNameUnd:"#"+sControlNameUnd+"_Label";
      return sIdSelector;
}  
 
SiebelApp.ABCToolTips._GetAppletProp=function(sAppletId){      
      var oGridId=$("#"+sAppletId+" .ui-jqgrid-view");
      var sDataTablePrefix="";
      if(oGridId.length>0){
            sGridId=oGridId.attr("id").replace("gview_","");

            //column headers are prefixed with 'jqgh_' plus the table id
            sDataTablePrefix="jqgh_"+sGridId;
            var isListApplet=true; 
      }else{
            var isListApplet=false;
      }
      return {"isListApplet":isListApplet,"sDataTablePrefix":sDataTablePrefix}
}

SiebelApp.ABCToolTips.Options={
      content: {     
            prerender : true,
            text: ""
      },
}      

SiebelApp.ABCToolTips.OptionsHeading=SiebelApp.ABCToolTips.Options;


Explanation:
var sAppletId=pm().Get("GetFullId");
var sApplet=pm().GetProxy().GetName();
var sModId="JLETooltips"; 

//Remove all tooltip indicators    
$("#"+sAppletId+" img["+sModId+"]").remove();

//look for table prefix, and also determine applet type
var oAppletProp=SiebelApp.ABCToolTips._GetAppletProp(sAppletId);


The above lines performs some basic initialisation, and determines whether we are dealing with a Form or List Applet

var oTooltipCfg=SiebelApp.ABCToolTips._GetToolTipsFrSvr(sApplet);


This method calls the server, and returns list of child Property Sets, as shown by the results pane of The Harness above.

The actual implementation of this Business Service isn’t provided in this article, because the LOV table isn’t the right Data source for a real solution, and the script library functions that I’ve used are unique to my local environment.

if(oTooltipCfg.length>0){
            // retrieve all controls on current applet
            var oControlsMap=pm().Get("GetControls");

            // Loop around all the Tooltips retrieved from the server for the current applet
            for(var sTooltipCntr in oTooltipCfg){
                        var oOpt=(oAppletProp.isListApplet)?SiebelApp.ABCToolTips.OptionsHeading:SiebelApp.ABCToolTips.Options;     
                        oOpt.content.text = oTooltipCfg[sTooltipCntr]["Msg"];  
            
                        //Lookup control definition
                        var oControl=oControlsMap[sTooltipCntr];
                        if(typeof oControl!=="undefined"){         
                                    var sIdSelector=SiebelApp.ABCToolTips._GetControlListColSelector(oAppletProp,oControl.GetName());
                                    $(sIdSelector).qtip(oOpt);
                                    $(sIdSelector).append("");
                        }
            }          
}


The block of code above is fairly well documented. However, attaching qTip itself requires a bit more explanation.

The syntax for attaching qTip Tooltips looks like this

$(sIdSelector).qtip(oOpt);

The form control selector is basically the Control name with spaces replaced with “_”, appended by “_Label”.

SiebelApp.ABCToolTips._GetAppletProp=function(sAppletId){      
            var oGridId=$("#"+sAppletId+" .ui-jqgrid-view");
            var sDataTablePrefix="";
            if(oGridId.length>0){
                        sGridId=oGridId.attr("id").replace("gview_","");

                        //column headers are prefixed with 'jqgh_' plus the table id
                        sDataTablePrefix="jqgh_"+sGridId;
                        var isListApplet=true; 
            }else{
                        var isListApplet=false;
            }
            return {"isListApplet":isListApplet,"sDataTablePrefix":sDataTablePrefix}
}


List column selectors are a bit harder. It is a combination of a Grid prefix+ the Control name with spaces replaced with “_”. The function above shows the jQuery selector that I used to get the Grid Id.

Finally the oOpt object tells qTip what message to display, how to display the tooltip, and other options such as style.

oOpt.content.text = oTooltipCfg[sTooltipCntr]["Msg"];

In our example above, oOpt.content.text is the property that qTip will display as the message. More details can be found on the qTip website

Trigger

The final piece of this design is to put the following code in your Post_ShowUI handler. This will call the Tooltip loader every time an applet is rendered.


Now enjoy the fruits of our efforts.


Notice, that we have a little feel good icon to indicate to the user which Control/List have a Tooltip.

Conclusion


Tooltips are a lot easier to implement in Open UI, but it doesn’t mean that they are easy to implement. As with anything that is remotely complex in Siebel, there are two approaches one can take.

You can put on a builders hat, and say let’s create individual physical renders, hard code the tooltips into each file, and say job done in 5 minutes. This approach is cheap, but it has a nasty long term effect.

However if we put on our Architect hat, we will need to consider performance impacts, implement a server side script library, build client side libraries, and also satisfy custom requirements in a maintainable fashion. Not all of these issues have been addressed in this Article, but I’ve provided what I promised. An elegant Tooltips implementation in Open UI.